
Fish Tank
How To Prepare Your New Aquarium For Fishes?
Bringing home a new aquarium is an exciting endeavor, opening up a world of vibrant aquatic life and the serene beauty of underwater ecosystems. However, creating a suitable environment for your fish requires careful preparation and consideration. From selecting the right equipment to establishing a healthy habitat, there are several crucial steps to ensure the well-being and longevity of your aquatic companions.
In this comprehensive guide, we will walk you through the essential aspects of preparing your new aquarium for fishes. Whether you’re a novice or an experienced hobbyist, the information provided here will serve as a valuable resource to help you set up a thriving aquatic habitat.
So, let’s dive in and learn how to prepare your new aquarium for fishes, ensuring their health, happiness, and longevity.
How To Prepare Your New Aquarium For Fishes?

Knowing how to prepare a fresh new aquarium for your fishes is extremely important.
With the initial stages being perfect, there will be almost no problems in the coming days. Now lets go over the steps to make the perfect new aquarium.
Maintain Balance Before Adding Fish to a New Aquarium
Getting a perfectly balanced ecosystem is the ultimate aim of setting up an aquarium. Therefore, patience is the key when setting up an aquarium.
Every step that you take and follow should be for a perfect environment for your fish to be in their best health.
But a balanced ecosystem cannot be obtained right away. It takes days and sometimes weeks for it. Therefore, you should start with a few number of fishes for the cycle to kick in. So, when the nitrogen cycle is formed, then your aquarium is ready to go.
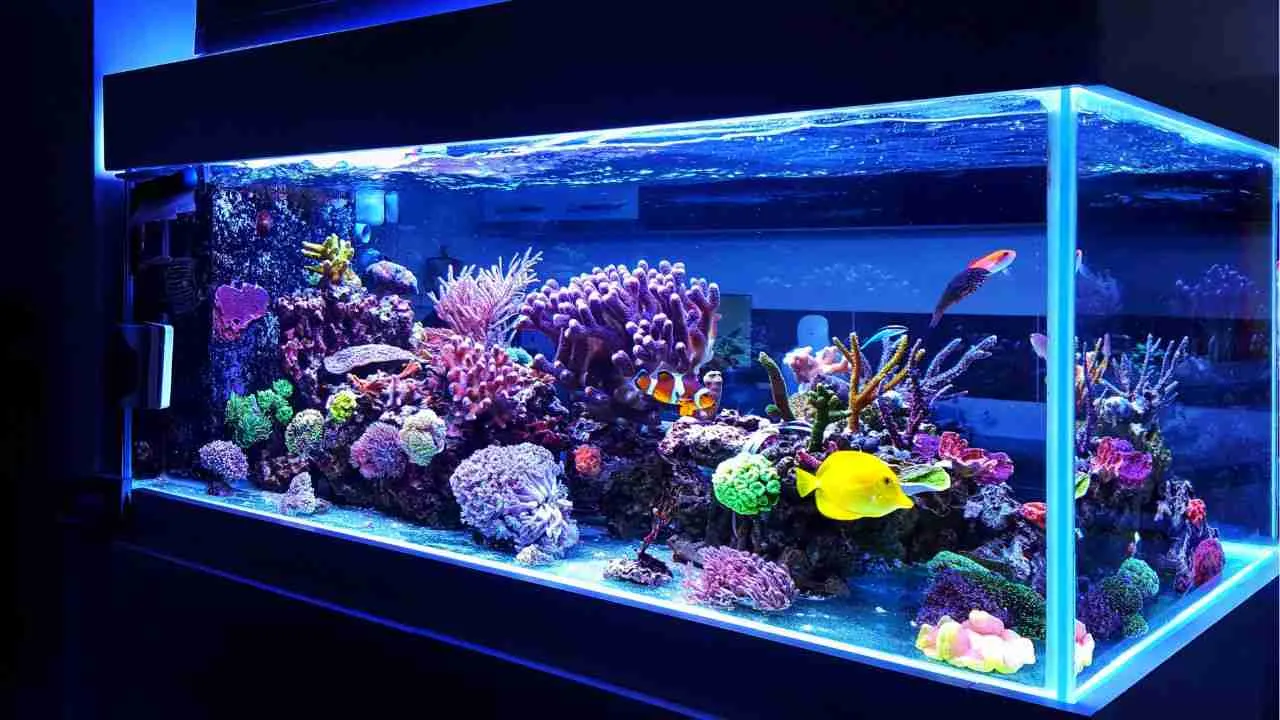
Decorate Your Aquarium for the Fish
Decorating your aquarium not only enhances its aesthetic appeal but also plays a vital role in the well-being and comfort of your fish. Consider using natural materials such as live plants, driftwood, and rocks, as they provide hiding spots, breeding areas, and a sense of security for your fish.
Additionally, artificial plants and ornaments designed specifically for aquariums can add color and visual interest.
When decorating your aquarium, it’s important to consider the specific needs and behaviors of the fish species you plan to keep. Different species have varying preferences for decorations, swimming space, and territories. Some may require open spaces for swimming, while others may thrive in heavily planted areas.
How to prepare soil, sand, and gravel for an aquarium?

Every aquarium need a solid foundation upon which to develop. The bottom of the aquarium is covered with a variety of materials. They include dirt, sand, and gravel. To ensure that the water is not polluted by the material used to cover the bottom of the aquarium. Each of the components is often offered in bags and is readily contaminated.
- Rinse the substrate: Thoroughly rinse the dirt, sand, and gravel with running water until the water runs clear. This aids in the removal of any dirt, debris, or contaminants.
- Sterilise the substrate: You can sterilise the substrate by boiling it for 10-15 minutes or baking it at 350°F (175°C) for 30 minutes to destroy any hazardous bacteria or parasites. This step, however, is unnecessary, especially if you bought the substrate from a reputable aquarium retailer.
- Layer the substrate: You may construct different levels of substrate depending on your preferences, such as a bottom layer of dirt covered by a layer of sand or gravel. To create a healthy foundation for plant roots and beneficial microbes, the substrate should be at least 2-3 inches deep.
- Place a plate or saucer on top of the substrate before adding water to the aquarium to avoid the water from upsetting it. Pour the water over the dish slowly, so that it distributes evenly across the surface.
- Plant and decorate: Once the substrate is in place, you may add plants, rocks, and other decorations to make an aquatic environment that looks natural.
To keep a healthy habitat for your fish and plants, test the water on a regular basis and maintain the aquarium’s filtration and water chemistry.
It is better to lay the dirt, sand, or gravel in big buckets. Then fill the bucket halfway with freshwater to thoroughly cover the material’s surface. Manipulate the material and let the water rinse away any debris.
How to prepare driftwood, bogwood, and rockwork for aquariums?

Fish enjoy having items on the tank bottom that provide areas for them to hide from other fish. Driftwood, bogwood, and other sorts of rock are examples. If you’re going to put anything that isn’t artificial in the tank, make sure you lightly wash it first.
It is critical to prepare driftwood, bogwood, and rockwork for aquariums so that they are safe and do not bring hazardous chemicals or poisons into your aquatic habitat. Here are a few steps you can take:
Driftwood and Bogwood:
- Soak the wood: Immerse the driftwood or bogwood in water for several days, changing the water daily. This aids in the removal of tannins, which can discolour the water and reduce its pH.
- Scrub the wood: Scrub the wood with a brush to remove any dirt or debris. This also aids in the removal of any soft or deteriorating wood.
- Boil the wood for at least an hour to sterilise it and destroy any potentially hazardous germs or parasites. This also aids in the release of any leftover tannins.
- Allow the wood to cool completely before placing it in the aquarium.
- Place the wood in the tank, ensuring sure it is sturdy and will not fall over. You may also use fishing line or suction cups to secure it.
Rockwork:
- Rinse the rocks: Thoroughly rinse the rocks under running water to remove any dirt or debris.
- Soak the rocks for several days in a pail of water, changing the water everyday. This aids in the removal of any dangerous substances or pollutants.
- Scrub the rocks: Scrub the rocks with a brush to remove any leftover dirt or debris.
- To sterilise the pebbles, boil them for at least an hour or bake them at 350°F (175°C) for 30 minutes to destroy any hazardous bacteria or parasites.
- Allow the rocks to cool fully before placing them in the aquarium.
- Place the rocks in the aquarium, making sure they are sturdy and will not fall over. You may also arrange them to give your fish and plants a more natural appearance.
To keep a healthy habitat for your fish and plants, test the water on a regular basis and maintain the aquarium’s filtration and water chemistry.
Then soak it in a bucket or container filled with water and activated charcoal. In the case of bogwood, activated carbon aids in the removal of tannins from the wood.
The activated carbon is very effective in removing additional pollutants from the water, allowing it to retain its crystal clear look.
You can wash the gravel, rocks, and ornaments with warm water in a bucket. You can simply keep rinsing them in the bucket and keep hanging water until the water comes as clear. Also, do not use any kind of soap or washing chemicals for they can harm the fish.
Aquarium Lighting Should Be Used to Create a Day and Night Cycle

Proper lighting is a crucial aspect of maintaining a healthy and thriving aquarium. Light is important as it has a lot of effect on the health of the fish.
One important aspect of aquarium lighting is creating a day and night cycle that mimics natural lighting conditions. Therefore, you should get a light with a built-in timer. Although, you can also get a light timer from a hardware store.
If you plan to have a non-planted tank, then you can turn on the light for about 6 to 8 hours. Although, if you want a planted tank then you need the light for 10 to 12 hours as plants need to generate energy.
Thoroughly wash aquarium gravel, rocks and ornaments with warm water, then add them to your tank
When setting up a new aquarium, it’s crucial to take the necessary steps to create a clean and safe environment for your fish.
One important aspect of this process is thoroughly washing the aquarium gravel, rocks, and ornaments before adding them to your tank. By washing them, you are getting rid of all kinds of dirt and other kinds of contaminants from them.
Fill your tank approximately one-third full with room temperature water from a clean bucket
Initially, you must fill your tank only one-third full. Ensure that the bucket you use is clean and free from any residues or contaminants. You should also use room temperature water as it helps prevent your fish from getting shocked. While adding water to your aquarium, you should pour it over a bowl to not disturb the substrate.
The final thing is to dechlorinate the water. You should use a de-chlorinator as it will help maintain the nitrifying bacteria in the tank.
Connect the airline tubing from the air pump to any air outlets inside your tank, such as air stones or decorations
The next important aspect is the aeration and circulation of water as it helps with oxygenation in the water column.
Connecting airline tubing from an air pump to air outlets inside your tank, such as air stones or decorations, helps improve oxygenation and adds visual interest to your aquarium.
All this will create circulation and water movement which helps a lot with oxygenation. You can also use an aquarium check valve which prevents water from backing out of the aquarium.
- Add the rest of the water: Then follows filling the aquarium with water. You should fill the tank with water but make sure to leave some space in the top for air.
- Turn on filter (and heater if applicable): Then you should turn on the filter and the heater in your aquarium. This will startup your aquarium and prepare the water column for your fishes.
Secure the submersible heater near your water flow and place the thermometer as far away from the heater as possible
To achieve proper temperature regulation in your aquarium, it’s important to secure the submersible heater correctly and place the thermometer strategically.
To maximize the effectiveness of the heater, it’s recommended to position it near the water flow. Placing it near the filter outlet or in an area with natural water movement ensures the heat is evenly distributed.
A thermometer is also important as it helps monitor the temperature levels. To obtain accurate readings, place the thermometer as far away from the heater as possible.
This placement allows you to monitor the overall water temperature, rather than solely the temperature influenced by the heater.
Plug in your air pump, power filter and heater and start them up
After setting up all the equipment in place, you should plug them in and rev them up. Every equipment such as a thermometer, air pump, filter and so on each has its own importance in the aquarium.
After plugging them in and turning them on, you should check if they’re working properly. You should set the water temperature to the range that is preferred by the species of fish you want. Moreover, you should see if the water flow is optimum or not. Additionally, you should never turn on the heater while it is not submerged in the water.
Then you should observe all the equipment for a day to see for any faulty equipment.
Check the conditions and temperature after a few hours
Setting up a new fish tank requires careful attention to detail, and once the essential equipment is running, it’s important to monitor the conditions and temperature after a few hours.
The first thing you should do is to check the water conditions in your fish tank. Use a water testing kit to evaluate parameters such as pH, ammonia, nitrite, and nitrate levels. Compare the results to the recommended ranges for your specific fish species. Check the temperature of the water using a reliable aquarium thermometer. Ensure that it remains within the desired range for your fish species.
If your aquarium gets cloudy for the first few days, then you should not worry. This usually happens with new aquariums as harmless bacterial bloom can occur while the nitrifying cycle is being set up.
Choosing a location for the aquarium
There are a number of factors that you need to take into consideration when you are choosing the location of your aquarium in your home. We came up with a short list of some of the important things you need to be aware of when deciding where you should put your new aquarium.
- The area should be high visibility – Choose a spot that allows it to be viewed from many different angles. That way it can be the centerpiece that you want it to be.
- Having storage nearby – Depending on the size you will need to have an area very close to hold the aquarium filtration equipment and other supplies.
- Access to adequate electrical service – The equipment needed to keep the aquarium on a regular basis requires a lot of electricity. The larger the aquarium you are wanting the more electricity will need to have access to. changing out the water every 2 to 4 weeks.
- Accessible freshwater supply – Once you have established your aquarium you will also have to account for water changes. In order to keep the water clean and safe for your fish you will need to have access to plenty of fresh water.
- Free from exposure to extreme cold and heat – Tropical fish need to have the water maintained at a specific temperature. Since aquariums are made from either glass or acrylic the ambient air temperature in the room will affect the temperature of the water. Be sure that the room you choose is neither too warm nor too cold.
- Water disposal – Since you will be replacing the water inside the aquarium frequently you want to be sure that you have a way to readily dispose of the old water. Having a large sink or basin close to the location of the aquarium is highly recommended.
- Keep foot traffic to a minimum – If you have a glass aquarium you want to be especially careful that you limit the foot traffic from coming in contact with the outside of the aquarium.
Conclusion
In conclusion, preparing a new aquarium for your fishes is a crucial step in creating a healthy and thriving aquatic environment. By following the tips and guidelines discussed in this article, as well as referring to the provided resources, you can ensure a successful setup process.
By taking these steps, you can provide a safe and comfortable home for your fishes, promoting their overall well-being and enjoyment. Remember, a well-prepared aquarium sets the stage for a beautiful underwater world and allows you to appreciate the beauty and wonders of your aquatic companions.

 Fish2 years ago
Is Apple Cider Vinegar Safe for Fish?

 Fish Tank2 years ago
How Many Fishes Can you Keep in your Fish Tank?

 Cleaning2 years ago
How to Clean a Fish Tank Glass? Step By Step Process

 Cleaning2 years ago
How Do you Clean Aquarium Gravel?

 Cleaning2 years ago
How to disinfect your Aquarium?

 Fish2 years ago
20 Best Fish breeds for your Aquarium

 Acrylic Aquarium2 years ago
Which Aquarium is Better – Glass or Acrylic?

 Fish2 years ago
How Do You Know When Fishes Are Hungry?